Connecting SAP Systems
Requires validation of SAP function module and role configuration steps
The MyPass SAP Connector enables seamless integration between MyPass Cloud and SAP systems, allowing end-users to synchronize, reset, or independently manage their SAP passwords directly from the Password Manager platform. This integration significantly improves user experience, reduces helpdesk workload related to password issues, and strengthens security by enforcing consistent password policies across the enterprise. The MyPass SAP Connector is composed of two distinct connectors, each designed for different SAP technology stacks:
- ABAP Connector – For classic SAP NetWeaver ABAP-based systems (e.g., SAP ECC, S/4HANA, BW, SRM, CRM, etc.).
- Java/UME Connector – For Java-based or User Management Engine (UME) systems such as SAP Process Integration/Process Orchestration (PI/PO), Composition Environment (CE), SAP HANA Platform, SAP Portal, and other Java-stack applications.
The connector supports all SAP systems running Kernel version 4.6E and newer.
Network and Infrastructure Pre-requisites
To ensure successful integration, the following network and infrastructure components must be in place:
- SAP Environment: A functioning SAP system with access to the SAP GUI and RFC ports.
- MyPass Gateway Server: A Windows Server (2016 or later) to host the /docs/deployment/getting-started.md application, acting as a secure intermediary between the MyPass Password Manager Server and the SAP connector.
- Network Connectivity: Open firewall ports outbound from the MyPass Gateway Server towards your SAP Instance on the following TCP ports
32##(SAP GUI) and33##(RFC).##represents the system number (SYSNR). - SAP Function Module: The password reset logic must be implemented as a remote-enabled function module within SAP.
- System Account: A SAP user account with sufficient privileges to execute remote function calls and password operations.
The SAP integration consists of the following components:
- A custom SAP function module (
Z_FPC_PASSWORD_CHANGE) installed on each SAP instance. - A privileged SAP account used by MyPass for remote operations. Note: The SAP connector does not integrate with SAP CUA (Central User Administration). It operates independently on each SAP instance.
Installation Steps
Please note that this section is targeted SAP personnel. To communicate between SAP and Password Manager you have to install a module on your SAP installation. The function module is called: Z_FPC_PASSWORD_CHANGE. General role / profile for all users. End-users need access to remote logon and check own user’s password via a remote enabled function module – otherwise FastPass will not be able to check that the Password Change has happened.
SAP Authorization Objects
End-User Role
| Authorization Object | Function | Values |
|---|---|---|
| S_RFC | RFC_TYPE | FUGR |
| RFC_NAME | SYST | |
| ACTVT | 16 - Execute |
System Admin Role
| Authorization Object | Function | Values |
|---|---|---|
| S_RFC | RFC_TYPE | FUGR |
| RFC_NAME | SYST | |
| ACTVT | 16 - Execute | |
| S_RFC | RFC_TYPE | FUGR |
| RFC_NAME | Z_FPC_PASSWORD | |
| ACTVT | 16 - Execute | |
| S_RFC | RFC_TYPE | FUGR |
| RFC_NAME | RFC1 | |
| ACTVT | 16 - Execute | |
| S_RFC | RFC_TYPE | FUGR |
| RFC_NAME | RFC_METADATA | |
| ACTVT | 16 - Execute | |
| S_USER_GRP | CLASS | SUPER |
| ACTVT | 05 - Lock |
Special Remarks:
Additional security configurations (e.g., S_TABU_DIS) may be required depending on customer-specific policies. Use transaction ST01 for authorization trace analysis.
MyPass connects to SAP through RFC where it calls both a custom function module and a standard SAP module and for this it uses a specific SAP user that can be created with authorization exactly for these operations. The SAP integration consists of four key tasks:
- Create Function Group
Z_FPC_PASSWORD - Create Function Module
Z_FPC_PASSWORD_CHANGE - Create SAP User
PWRESET - Create SAP Role
Z_FPC_PASSWORD
Steps to get your SAP instance integration ready
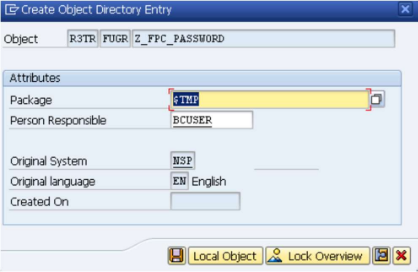
Create Function Group
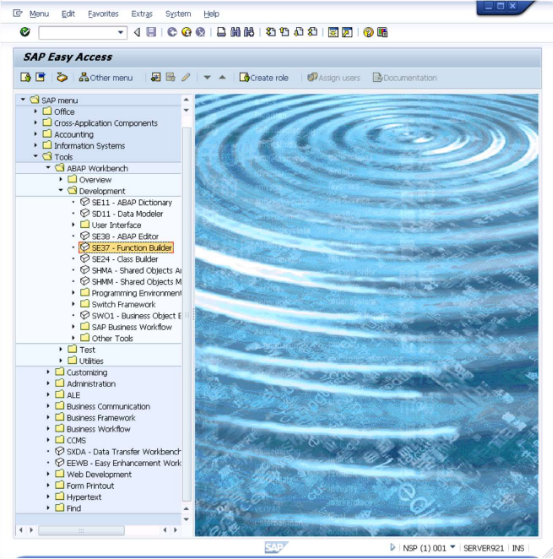
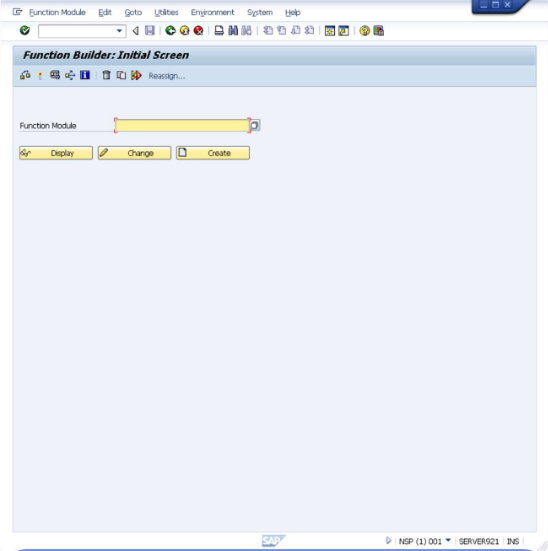
- Open SE37 - Function Builder.
This opens the interface shown below.
- Navigate to
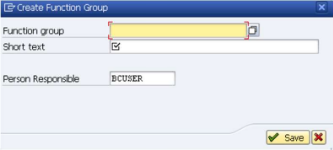
Goto → Function Groups → Create Group.
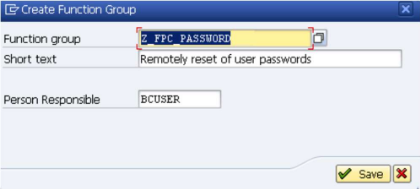
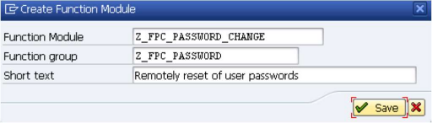
- Enter "Z_FPC_PASSWORD" in the "Function Group" field and enter "Remotely reset of user passwords" in the "Short text" field like shown below.
- Click Save and confirm.
- Select
icon to save the information.
Function Group configuration is now complete.
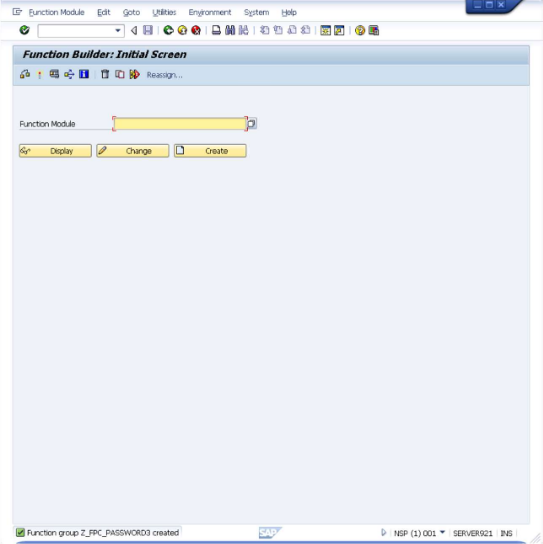
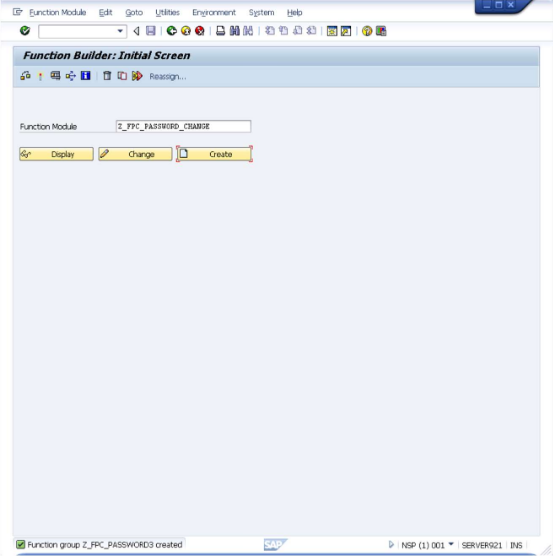
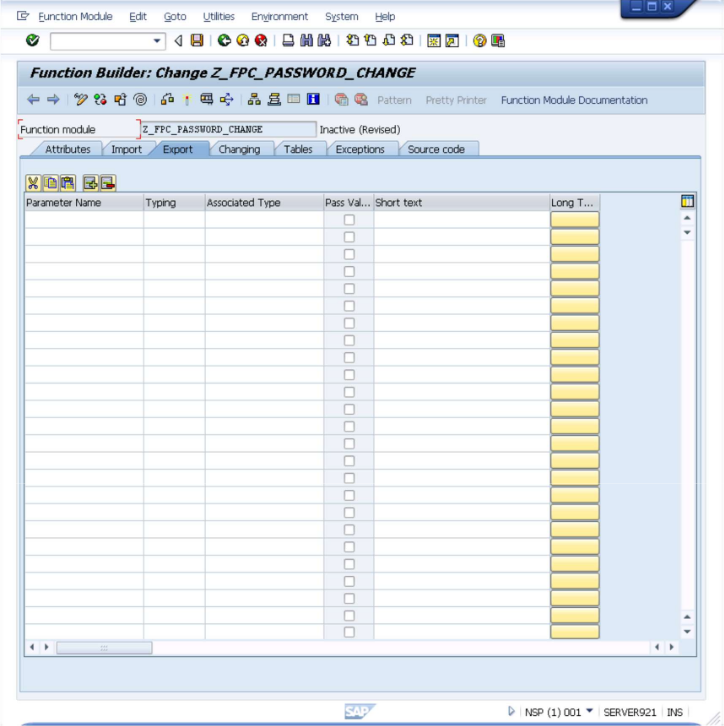
Create Function Module
- In SE37 - Function Builder,
enter
Z_FPC_PASSWORD_CHANGE.
- Click Create.
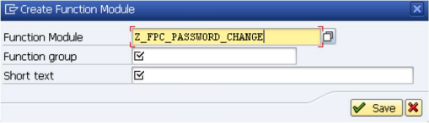
Enter the name of the just created function group
Z_FPC_PASSWORDin theFunction groupfield and enterRemotely reset of user passwordsin theShort textfield like shown below..Click Save.
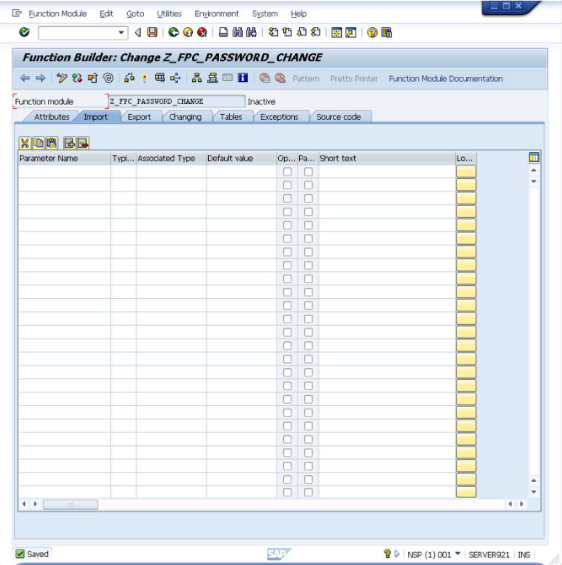
- This will bring up the Function Builder Change screen with the
Importtab selected.
- You need to enter and adjust values in more tabs so start by selecting the
Attributestab.
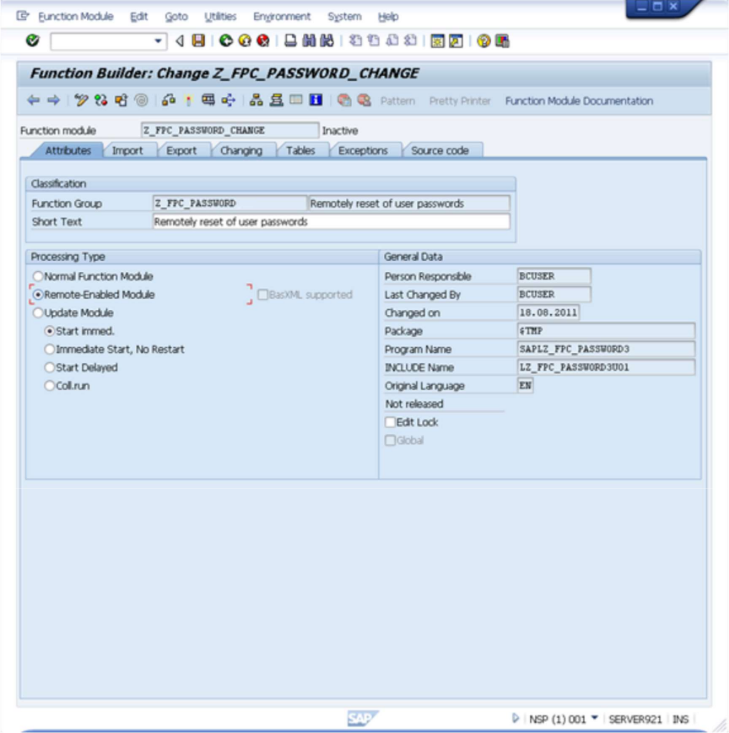
- Select the "Remote-Enabled Module" as shown above and select the
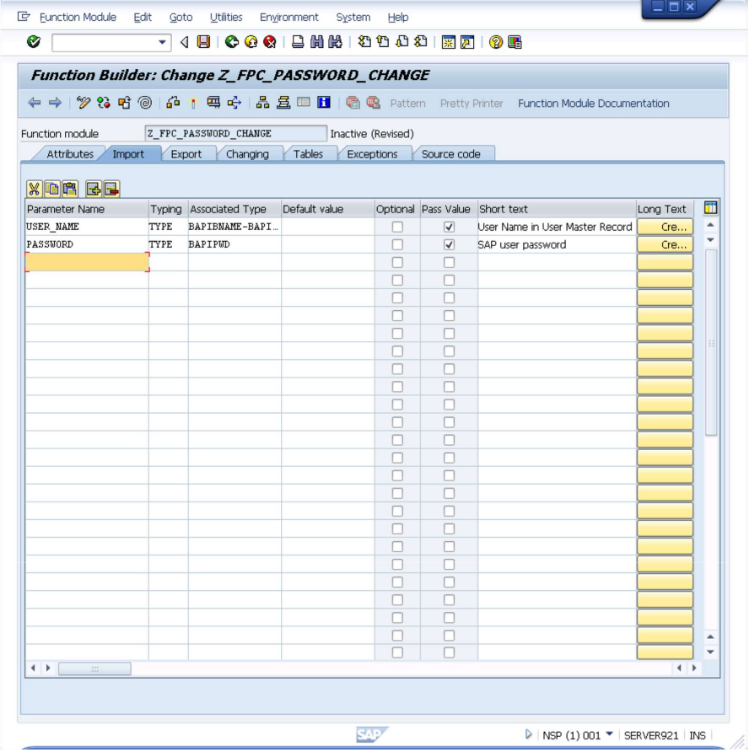
Importtab.In the table add a row with the following definition:
    Parameter Name: USER_NAME
    Typing: TYPE
    Associated Type: BAPIBNAME-BAPIBNAME
    Default value: (no value)
    Optional: Unselected
    Pass Value: Selected
    Short text: (will appear by itself)
and another with the following information:
    Parameter Name: PASSWORD
    Typing: TYPE
    Associated Type: BAPIPWD
    Default value: (no value)
    Optional: Unselected
- The screen will now look like what is shown below.
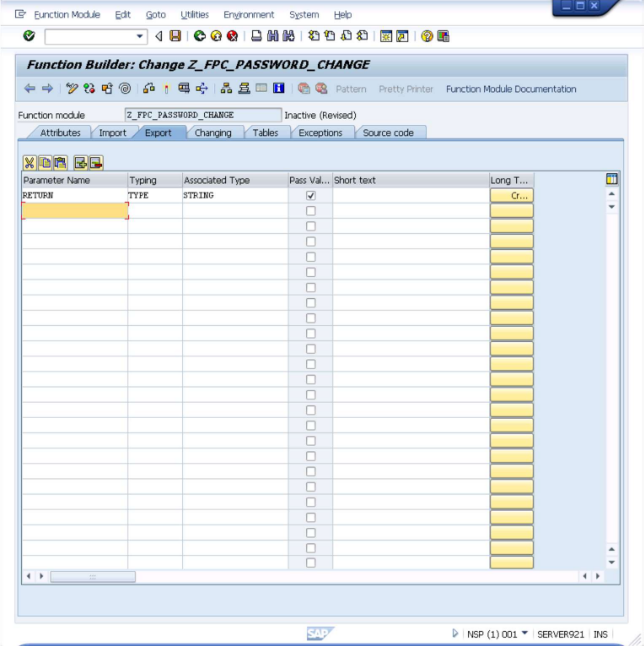
- Now select the
Exporttab.
In the table add a row with the following definition:
    Parameter Name: RETURN
    Typing: TYPE
    Associated Type: STRING
    Pass Value: Selected
    Short text: (no value)
- The screen will now look like what is shown below.
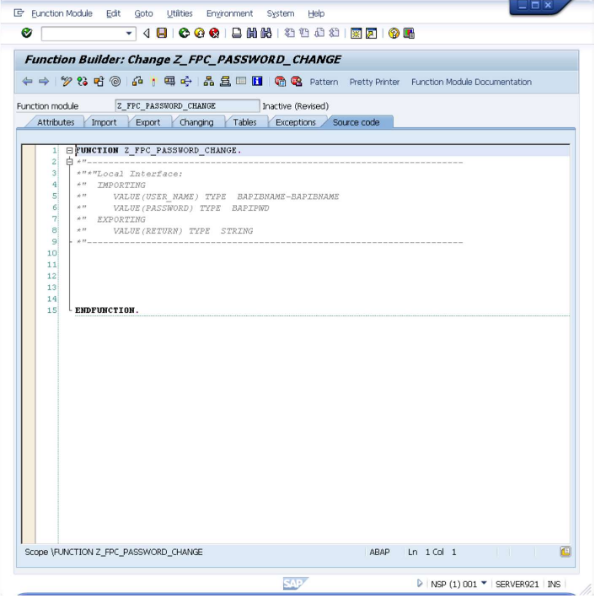
- Now select the
Source codetab.
- Copy & Paste the following code just above the
ENDOFFUNCTIONlabel.Full ABAP Function Definition: Z_FPC_PASSWORD_CHANGE
FUNCTION Z_FPC_PASSWORD_CHANGE.
*"----------------------------------------------------------------------
*"*"Local Interface:
*" IMPORTING
*" VALUE(USER_NAME) TYPE BAPIBNAME-BAPIBNAME
*" VALUE(PASSWORD) TYPE BAPIPWD
*" EXPORTING
*" VALUE(RETURN) TYPE STRING
*"----------------------------------------------------------------------
DATA: oref TYPE REF TO cx_root.
TRY.
DATA: l_USERNAME TYPE BAPIBNAME-BAPIBNAME VALUE USER_NAME,
l_PASSWORD TYPE BAPIPWD VALUE PASSWORD.
DATA: BEGIN OF l_LOGONDATA OCCURS 1.
INCLUDE STRUCTURE uslogond.
DATA: END OF l_LOGONDATA.
DATA: BEGIN OF l_USR02 OCCURS 1.
INCLUDE STRUCTURE usr02.
DATA: END OF l_USR02.
DATA: BEGIN OF l_ROLES OCCURS 1.
INCLUDE STRUCTURE BAPIAGR.
DATA: END OF l_ROLES.
DATA: BEGIN OF l_RETURN OCCURS 1.
INCLUDE STRUCTURE bapiret2.
DATA: END OF l_RETURN.
" Check if user exists
SELECT SINGLE * INTO CORRESPONDING FIELDS OF l_LOGONDATA
FROM usr02
WHERE bname = l_USERNAME.
IF sy-subrc NE 0.
RETURN = 'USER_NAME_NOT_EXIST'.
EXIT.
ENDIF.
" Check if user is locked
SELECT SINGLE * INTO CORRESPONDING FIELDS OF l_USR02
FROM usr02
WHERE bname = l_USERNAME.
IF l_USR02-uflag NE 0 AND l_USR02-uflag NE 128.
RETURN = 'USER_IS_ADMINISTRATOR_LOCKED'.
EXIT.
ENDIF.
" Check if password is deactivated
IF l_LOGONDATA-codvn EQ 'X' OR l_LOGONDATA-codvc EQ 'X'.
RETURN = 'USER_IS_PASSWORD_DEACTIVATED'.
EXIT.
ENDIF.
" Attempt to change password
CALL FUNCTION 'BAPI_USER_CHANGE'
EXPORTING
username = l_USERNAME
password = l_PASSWORD
passwordx = 'X'
TABLES
return = l_RETURN.
CLEAR l_RETURN.
READ TABLE l_RETURN WITH KEY type = 'E'.
IF sy-subrc EQ 0.
IF l_RETURN-id EQ '01' AND l_RETURN-number EQ 410.
RETURN = 'USER_IS_LOCKED_BY_ADMINISTRATOR_MAINTENANCE'.
EXIT.
ELSEIF l_RETURN-id EQ '00'.
IF l_RETURN-number EQ 187 OR l_RETURN-number EQ 188.
CONCATENATE 'PASSWORD_NOT_ALLOWED' l_RETURN-message INTO RETURN SEPARATED BY ';'.
EXIT.
ELSE.
CONCATENATE 'PASSWORD_RESET_FAILED' l_RETURN-message l_RETURN-id l_RETURN-number INTO RETURN SEPARATED BY ';'.
EXIT.
ENDIF.
ELSE.
CONCATENATE 'PASSWORD_RESET_FAILED' l_RETURN-message l_RETURN-id l_RETURN-number INTO RETURN SEPARATED BY ';'.
EXIT.
ENDIF.
ENDIF.
" Update user status
UPDATE usr02 SET
ltime = sy-uzeit,
uflag = 0,
pwdinitial = 0
WHERE bname = l_USERNAME.
COMMIT WORK.
RETURN = 'SUCCESS'.
EXIT.
CATCH cx_root INTO oref.
RETURN = 'FAILURE'.
EXIT.
ENDTRY.
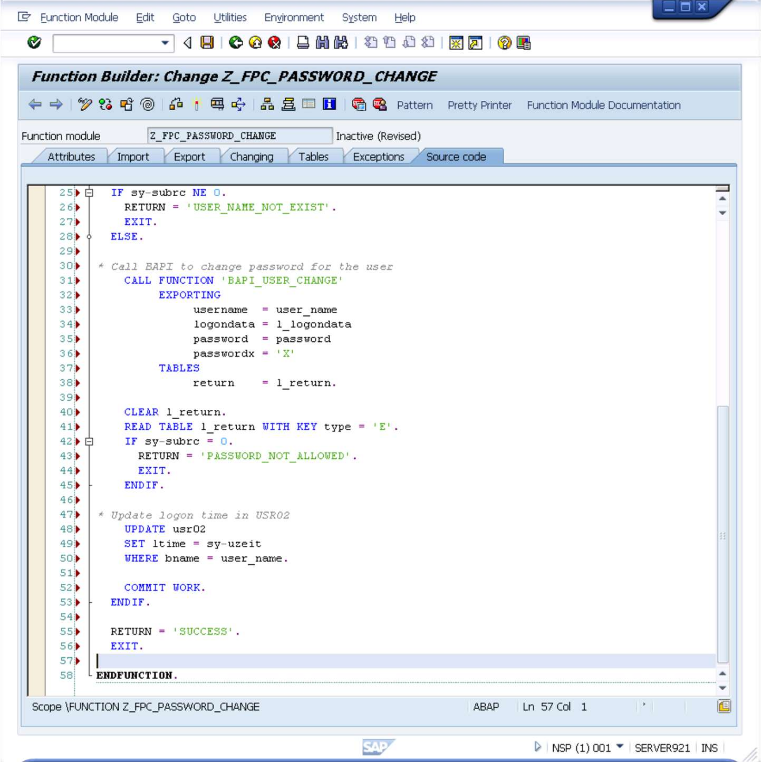
ENDFUNCTION.The screen will now look like the below.
Click the
icon or press CTRL+F2 to check the syntax.
Click the
icon or press CTRL+F3 to activate the module.
A screen with all inactive objects might appear. Here the related objects for this operation (the created
function group and the function module) shall be selected and the (Save) shall be clicked
Configuration of Function Module completed!
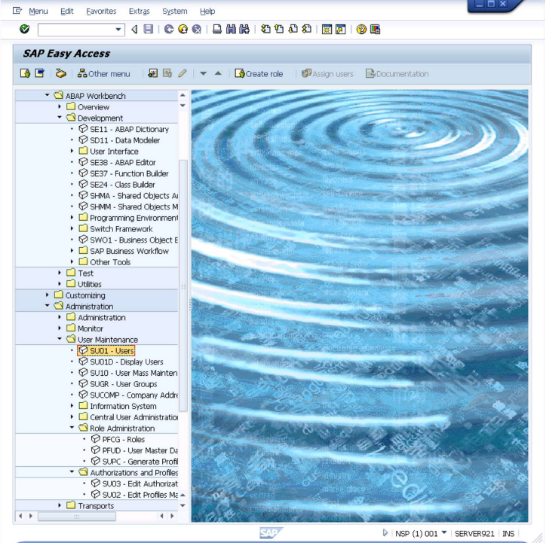
Create SAP User This step is done from the SAP User Maintenance module so get back to the main screen…
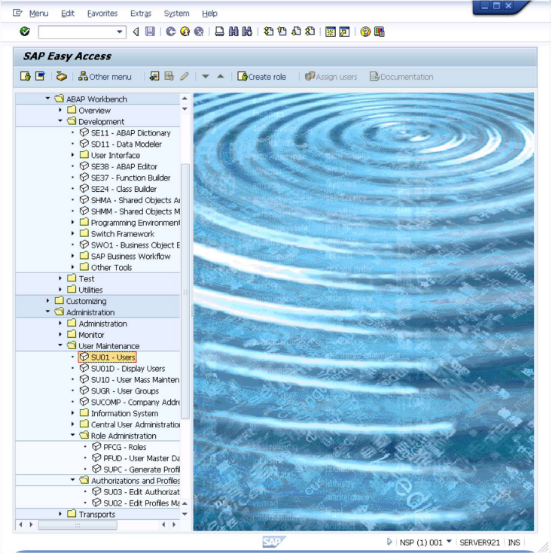
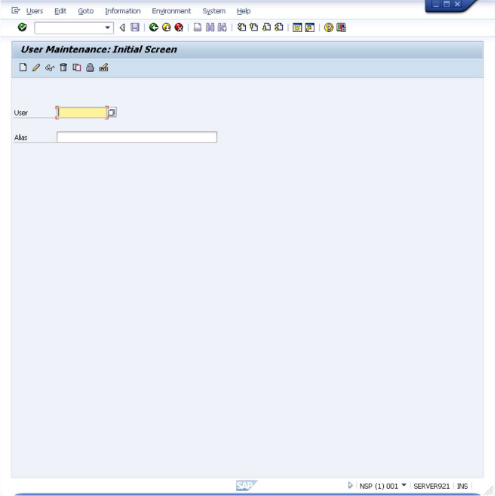
- Open SU01 - Users.
This will bring up the "User Maintenance: Initial Screen" interface.
- Enter
PWRESETand press F8.
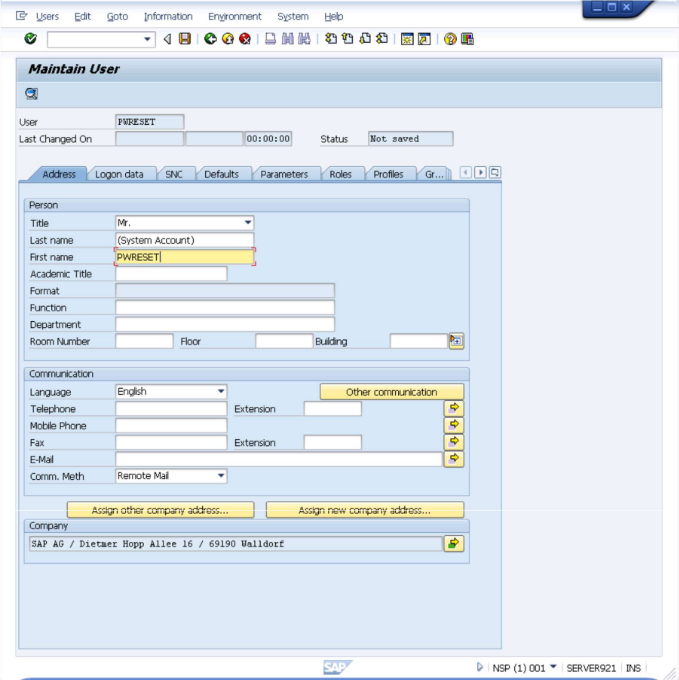
Enter values according to your policies or simply as shown below.
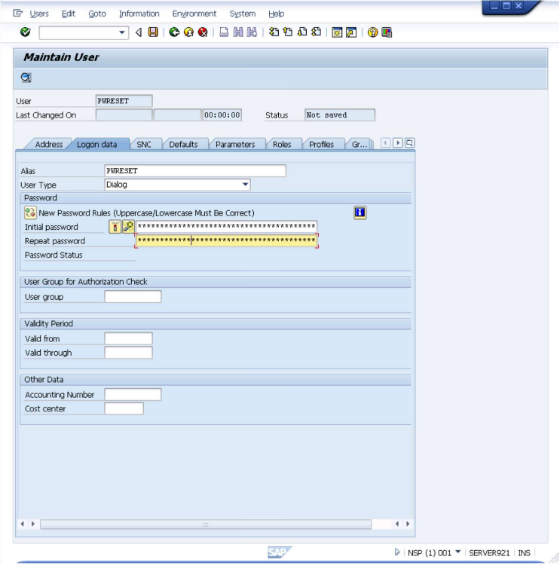
- Go to Logon Data tab.
- Set User Type to
Dialog. Click the icon or press CTRL+S to save the information. You will be returned to the "User Maintenance: Initial Screen" and you can just close it and return to the SAP main screen.
SAP system user
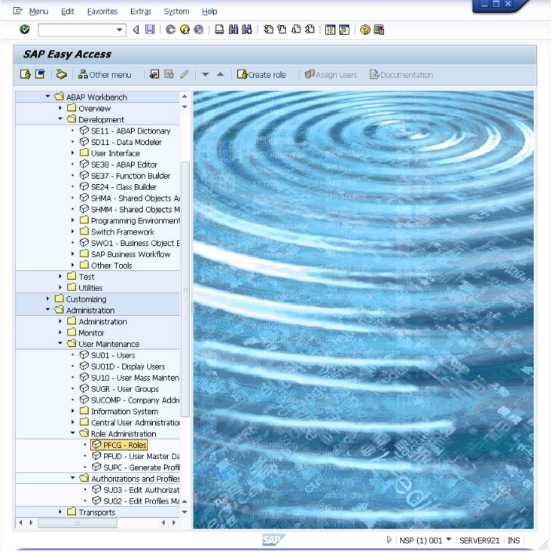
PWRESETis now created.Configure SAP Role
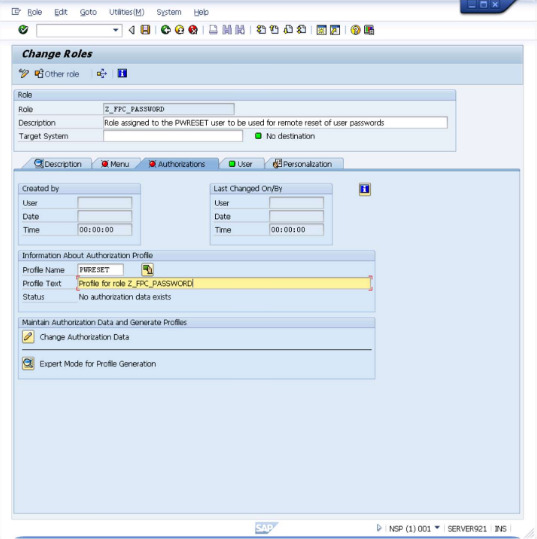
This step is done from the SAP Role Maintenance module so get back to the main screen… Select "PFCG - Roles" like shown below
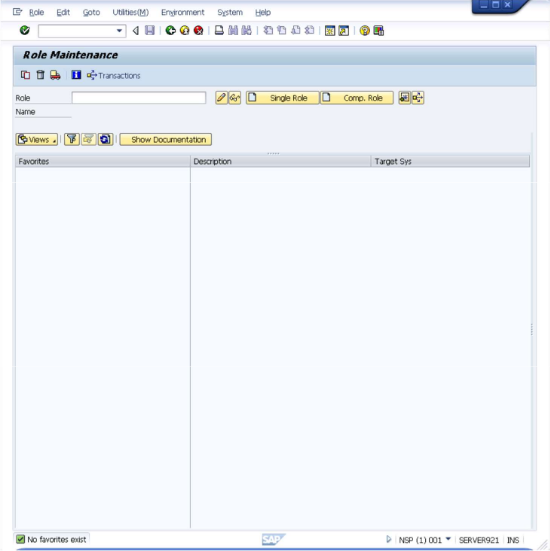
This opens the "Role Maintenance" screen as shown below.
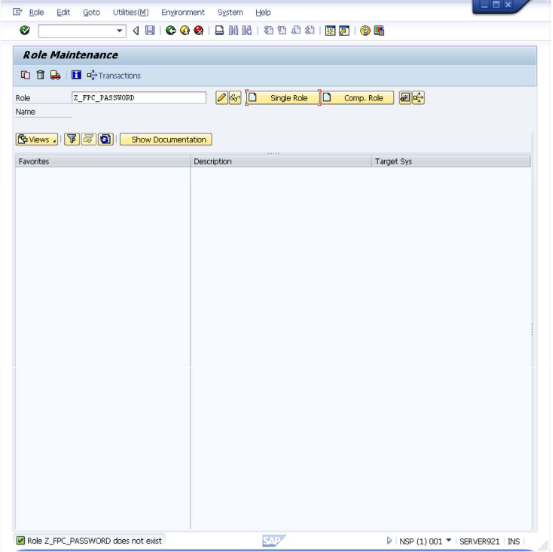
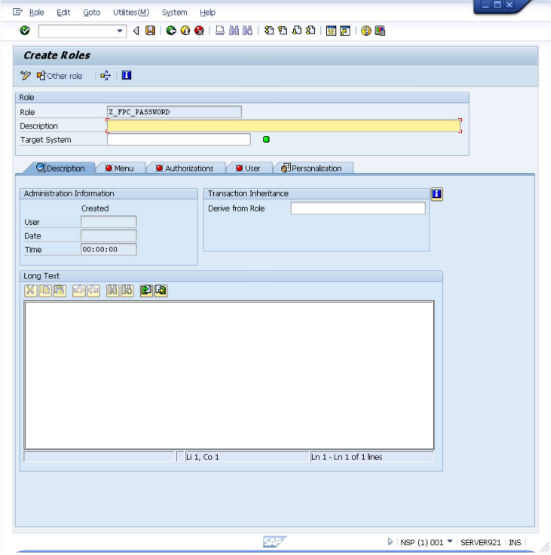
Enter "Z_FPC_PASSWORD" in the "Role" field and select the "Single Role" button.
This opens the "Create Roles" screen.
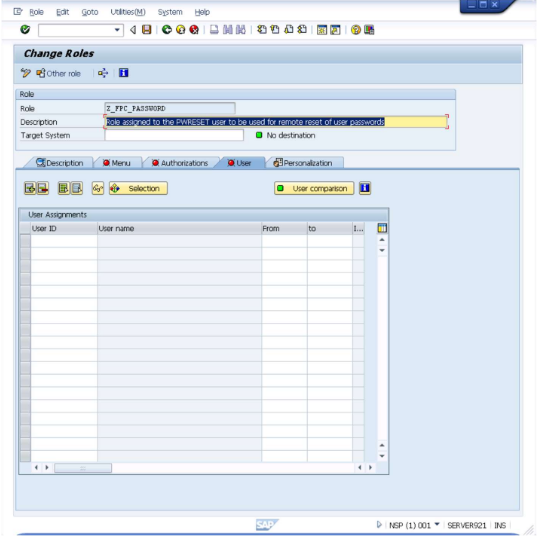
Assign authorizations to the
PWRESETuser.
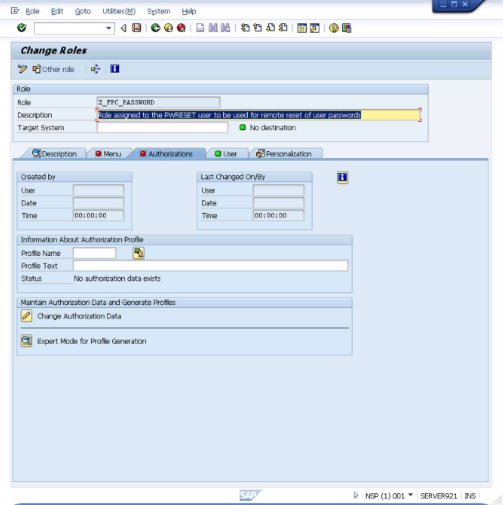
Now select the "Authorizations" tab.
Enter "PWRESET" in the "Profile Name" field and enter "Profile for role Z_FPC_PASSWORD" in the "Profile Text" field
Now select the labeled
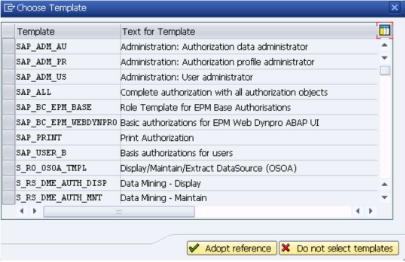
"Expert Mode for Profile Generation" and a dialog like the below will be shown.
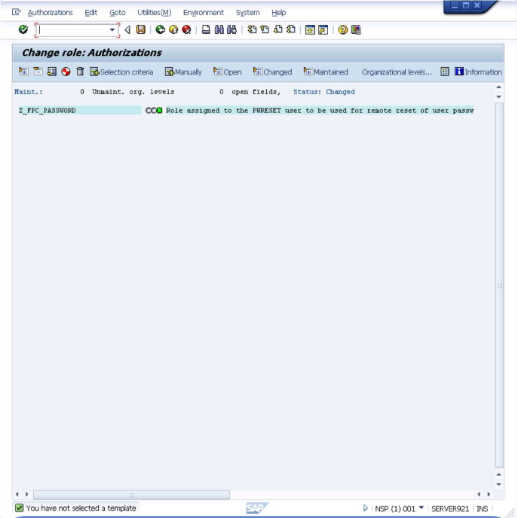
Select the "Do not select templates" button. The "Change role: Authorizations" screen will be shown.
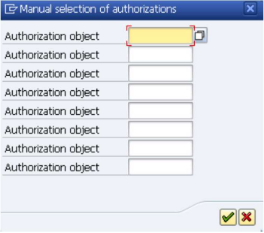
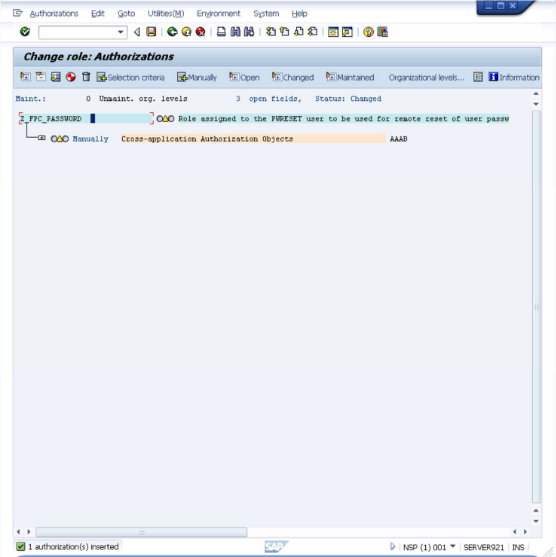
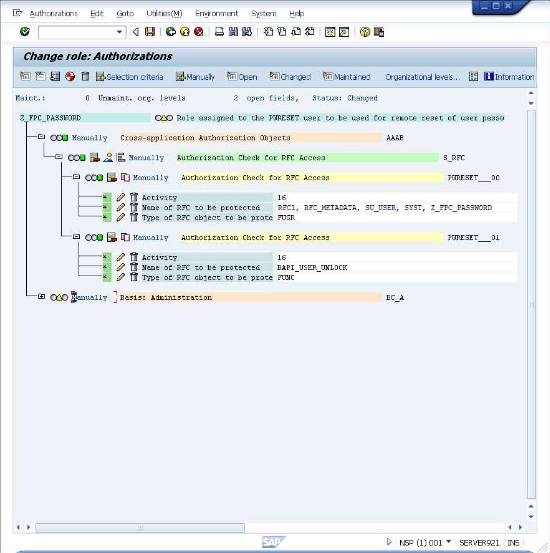
You shall now grant privileges to the role. Select the "Z_FPC_PASSWORD" entry and click on the icon labeled "Manually".
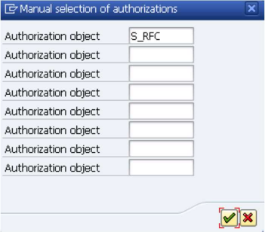
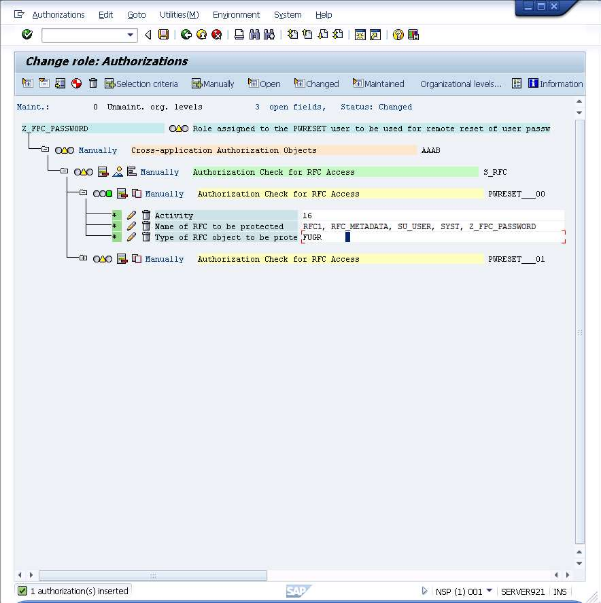
Enter "S_RFC" in the first fields, like shown below.
Click on the
icon.
Now customize the added entry by entering the following information under the "Authorization Check for RFC Access": Activity: Execute Name of RFC to be protected: SYST, Z_FPC_PASSWORD Function group Note: The information is entered by clicking on the input field and selecting from the values in the presented dialog After entering the values the screen will look similar to the below.
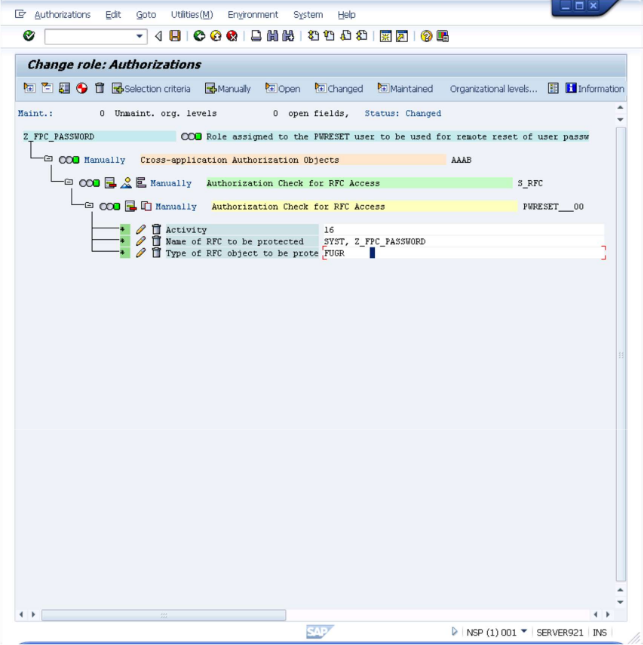
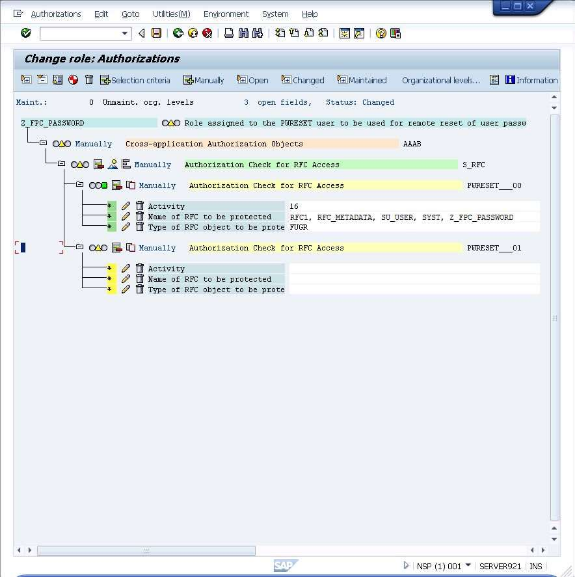
Now select the "Z_FPC_PASSWORD" entry and click on the
icon labeled "Manually" to add a >second entry.
Once more enter "S_RFC" in the first field and click on the
Continue, using the same process adding RFC1 and RFC_METADATA.
Click on the
icon or press CTRL+Shift+F11 to also expand the just added entry.
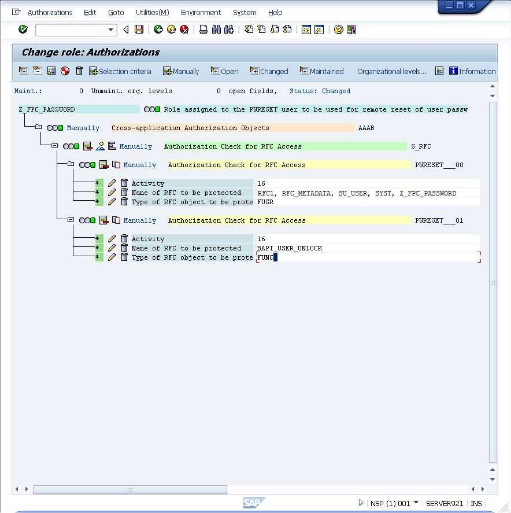
Now customize the added entry by entering the following information under the "Authorization Check for RFC Access": Activity: Execute Name of RFC to be protected: BAPI_USER_UNLOCK Type of RFC object to be protected: Function Module Note: The information is entered by clicking on the input field and selecting from the values in the presented dialog. After entering the values the screen will look like the below.
Activity: Execute Repeat the operation above with the following details: Name of RFC to be protected: BAPI_USER_UNLOCK Type of RFC object to be protected: Function Module After this the screen, will look like this:
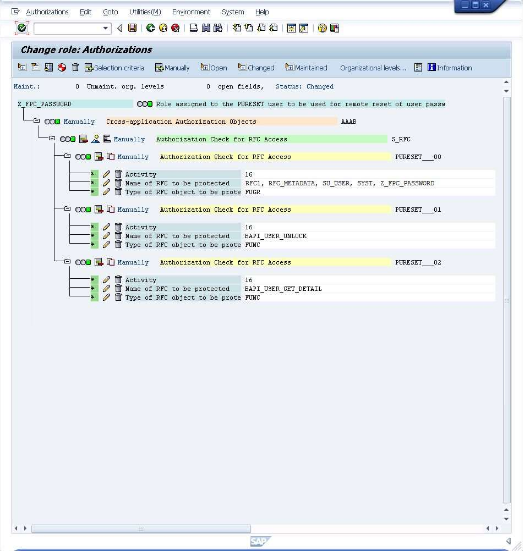
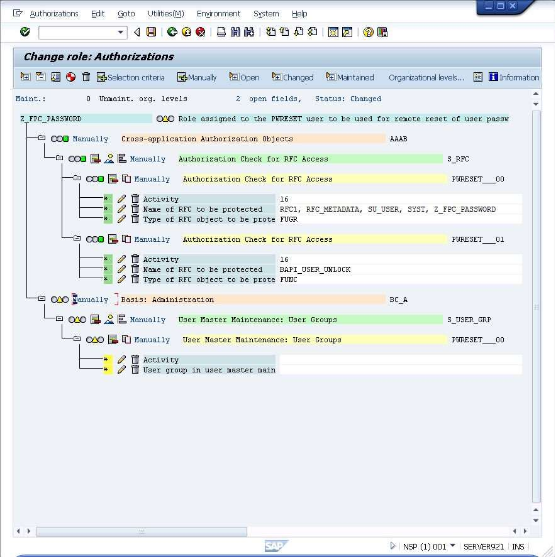
Now select the "Z_FPC_PASSWORD" entry and click once again on the
Enter "S_USER_GRP" in the first field and click on the
Click on the
Now customize the added entry by entering the following information under the "Authorization Check for RFC Access": Activity: Lock, Set Productive User group in user master main: SUPER Note: The information is entered by clicking on the input field and selecting from the values in the presented dialog. After entering the values the screen will look like the below.
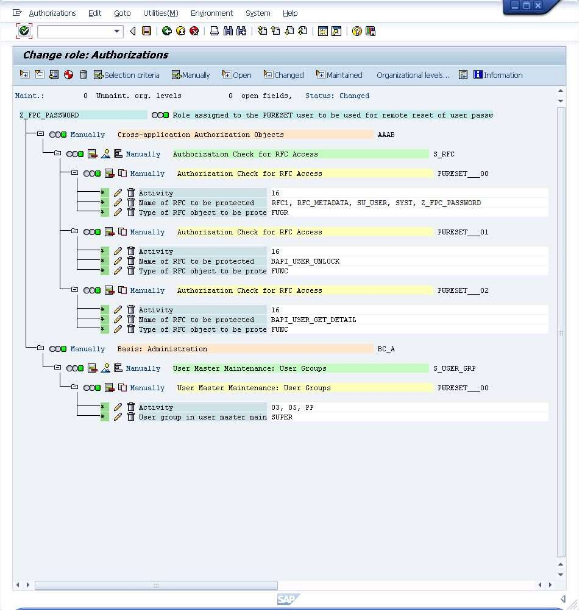
The configuration task is now completed but for the authorization profile to be used it must first be generated. First - click on the
icon or press Shift+F5 to invoke the generation. Finally - click on the
icon to return back to the "Change Roles" screen. Click on the
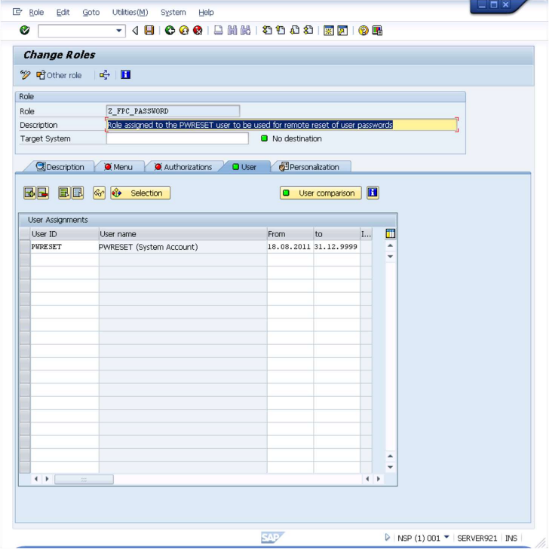
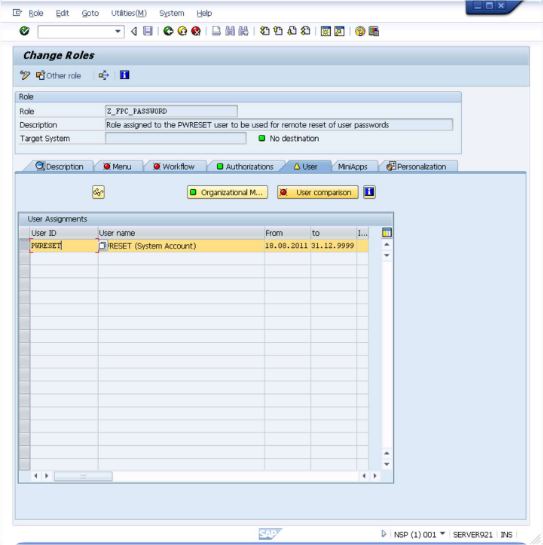
Select the "PWRESET" user as shown above and click on the "User comparison" button. A dialog like the below will be presented.
Click on the "Complete comparison" button. On completion, you will again return to "Change Roles" screen and you are done.


SAP CUA Compatibility
MyPass SAP Connector is compatible with SAP CUA. It sets the password on each client individually. Ensure the CUA parameter “initial password” is set to “everywhere” to allow password management from both MyPass and CUA.
Licensing – Simple Summary
| What you pay for | How it’s calculated |
|---|---|
| Active Directory (required) | One fee per managed user |
| Each additional system (e.g., SAP NetWeaver, S/4HANA, etc.) | Additional fee per managed user × per SAP system |
Real-world example
If you manage 800 end-users:
- Active Directory → 800 × base user license
-
- 2 productive SAP systems (e.g., ECC + S/4HANA) → + 1 600 × SAP connector user license (800 users × 2 systems)
- Total = base AD license + SAP connector license for 1 600 “user-system” seats
Clear and predictable - you only pay for the users you actually manage inside each SAP system.